 | |||
|
[ home | reviews | bylaws | library ]
View all our book reviews. Or, view our Software, hardware, and game reviews.
by Maria O. Arguello
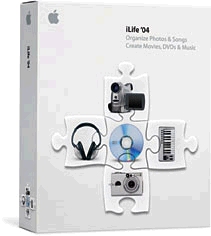
Life No. One : GarageBand GarageBand offers you three resources for creating professional-sounding tunes: prerecorded loops, professional samples, and digital recording. With the prerecorded loops, you can pick from an array of instruments like drums, guitars, bass, piano and many more. You compose your musical piece by dragging a snippet to the composition area and layering the tracks until the result sounds good to you. You can make your own musical samples if you have a MIDI synthesizer-type keyboard and use its built-in sequencer as a digital tape recorder. As you play your USB instrument your Mac speakers emit the rich sound of a grand piano. Just add an orchestra full of strings, some trumpets, maybe some bass�and your creation will delight you. You will think you have a live band right inside your Mac. You can even search for a specific mood. Click on the Column view in the lower left corner of the window. You will see a similarity with iTunes in the listings from which you can select (by genres, instruments, favorites, etc.). When you first open GarageBand you will get a window where you will give your song a title and specify where to save it. You can set tempo, time and key. You may create a New Folder and click Create. You'll get a grand piano keyboard�which I usually do not need, so I close it. Next click on the 'eye' icon or Control>Show Loop Browser. This will unfold thousands of prerecorded loops to choose from like drums, guitars, piano, strings, etc. When you choose a guitar you will see about a hundred loops. You may limit the selection of loops by further choosing more buttons in the Loop browser for categories such as World and Acoustic, which narrows the selections to four. Click and drag the name of a loop upward into the main track window to begin the building blocks of your creation. The loops with blue icons are actual recordings by professional musicians and you cannot change them. The loops with green icons are software instruments on which you can transpose notes as you could on your own. You must click Reset to see all the loop selections again. Keep repeating the drag and drop process until you're satisfied with your tune. What you are doing, in fact, is creating tracks and building them so they sound good together. That's the whole enchilada. When you work with tracks, you can change their names, isolate them, control their volume, and even silence them. To adjust the volume levels of tracks, expose the Mixer choose Track>Show Track Mixer. There you can adjust the volume to your heart's desire. It allows you to adjust left-to-right soundstage; and you can change the overall volume during the course of a piece. It has an overall volume map where by double clicking a track's name you can adjust the reverb and other features, and you can also adjust the tempo. One of the most fun features of GarageBand is playing the virtual software instruments or a USB piano keyboard. Choose Track>New Track and you get a plethora of instruments to choose from; horns, organs, strings, etc. Choose the instrument family you want to play on the left and the instrument sound on the right from the dialog like Guitars>Electric Tremolo, and your keyboard will sound that way. If you are starting with a brand new track you may want to choose Control>Metronome to help you stay on rhythm. And you may edit your recording by adding a note, deleting a note, or dragging a note. GarageBand is very, very cool. I spend many hours making my sambas Life No. Two: iTunes 4.2 The Source panel at the left of the window displays all your playlists, a CD you've inserted with songs, the Radio icon, and Music Store. Clicking on any of these opens its contents in the window. Among the new features in iTunes 4.2, you can browse tunes as they appear on Billboard's Top 100 lists from 1946 through 2003. Apple also optimized iTunes for the iPod mini. When you sync the iPod mini it will prioritize the download, installing most-played, top-rated, and your Playlist tracks first so you don't run out of room. Even though Apple improved the classical "store" by adding 12, 000 new tracks from Decca and Deutsche Grammophon Gesellschaft, it is still a very paltry selection. Life No. Three: iMovie Life No. Four: iPhoto iPhoto v4 underwent a significant overhaul. It is faster than before, even with 15,000 photos in a library. The older versions would have the speed of ketchup in a new bottle after 2,000 photos. Now it is possible to work in iPhoto quickly and efficiently. For example, the slide show allows rotation, deletion, and rating on the fly without interrupting your show. You may create smart albums with iPhoto v4. You simply create one and set its parameters and iPhoto will place the photos automatically in it. For example to create a smart album of all your 5-star-rated photos, choose File>New Smart Album and the Smart Album sheet opens from the top. Select a name for your smart album, then mark the condition, My Rating Is, and click on 5 stars. Select the + sign if you want to add more parameters. Once you are satisfied click OK. Your smart album is ready for prime time. The titles in the parameter setting window are for making a search of your photo library. Your search might be for those which have a 5-star rating, or have the name Mary in their title, or by dates or file names. To change a parameter of a smart album click its name and choose Photos>Show Info. We can now share iPhoto libraries in a local network via Rendezvous so that many people in the same household can share photos. Open Preferences>Sharing and turn on Share my photos. Specify a password if you wish, and close the window. Your albums will show up in other computers' iPhoto Source list, if they have "Look for shared folders" selected from their Preferences. Feel free to click and drag a photo you want to your desktop. You may edit it and print it if you like, as long as it doesn't carry a copyright notice�pretty unlikely among your family's or friends' photos. The old iPhoto placed all your photos in the Photo Library except for the Last Roll, which was placed beneath it. Now the Photo Library still holds all your photos, but clicking the triangle exposes all the photos in the Photo Library by year, month, and day. This feature makes it much easier to search for a specific photo when you know the approximate date when you took it. No more having to go to your home folder to fish for the iPhoto Library. The Preferences present several neat options to further organize your preset albums. In Sources when you turn on "Show last 6 months album," it will specify how many months' photos appear in this album. In "Show last 6 rolls album," you can see the last 6 imports of photos you've made. It's better than the previous version where you could see only the last imported photos. Other cool features: When you export your photos to your .Mac Homepage you have more templates to choose. In the new version of iPhoto you may make a new Film Roll from a selection of photos from your Photo Library. Go to File>New Film Roll From Selection and you'll have a new Film Roll without having to import one from a camera. Ordering a Book is now available beyond the US. In Edit mode there is a new Sepia button to give your photos a brownish-yellowish aged look. Life No. Five: iDVD 4 You may also set your DVD to auto-play only. Your technophobic fans will love this feature. When they insert your DVD in their complicated DVD player, they can just sit back and enjoy the DVD as it plays until it is finished.
— Maria O. Arguello | |||
View all our book reviews. Or, view our
Software, hardware, and game reviews.
[ home | newsletter | past | join | listserve | shareware | directory | links | md9 ]
© 2004 by Maria O. Arguello & MLMUG
Posted 05/04/04
Updated 08/22/04
